
JetList User Guide
Jetlist is a task manager app that allows you or your team to manage large amounts of tasks. Easily create, manage, and share daily tasks in a single account. Spend more time getting things done and maximize your productivity with instant todo list tracking.
Signing Up
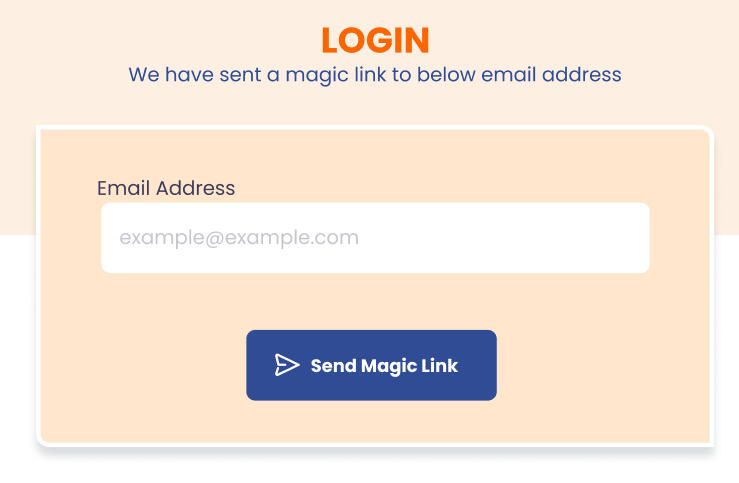
Jetlist uses passwordless authentication. There is no account creation process. Enter your email at JetList Login. Click “Send Magic Link”.
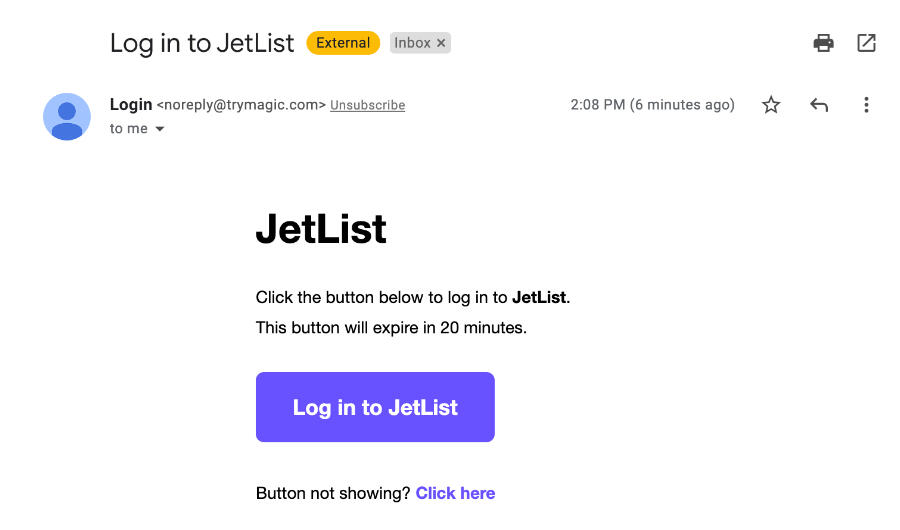
Login Email
An email with the subject “Log in to Jetlist” will be sent to the entered address. The message will have a button to securely log into Jetlist without password or username.
Basic Task Creation
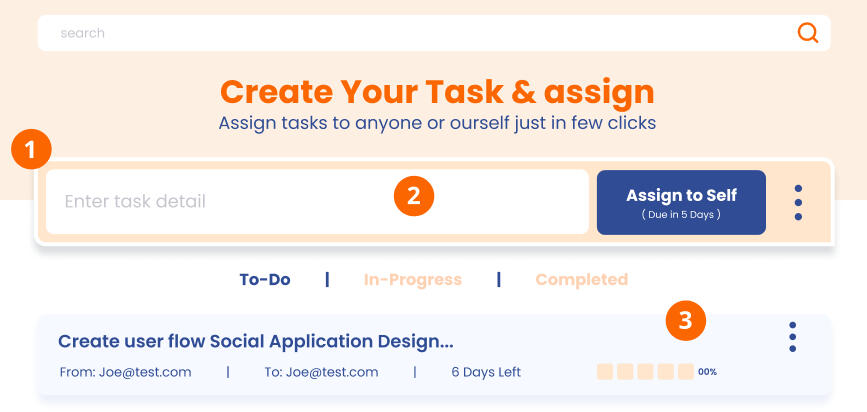
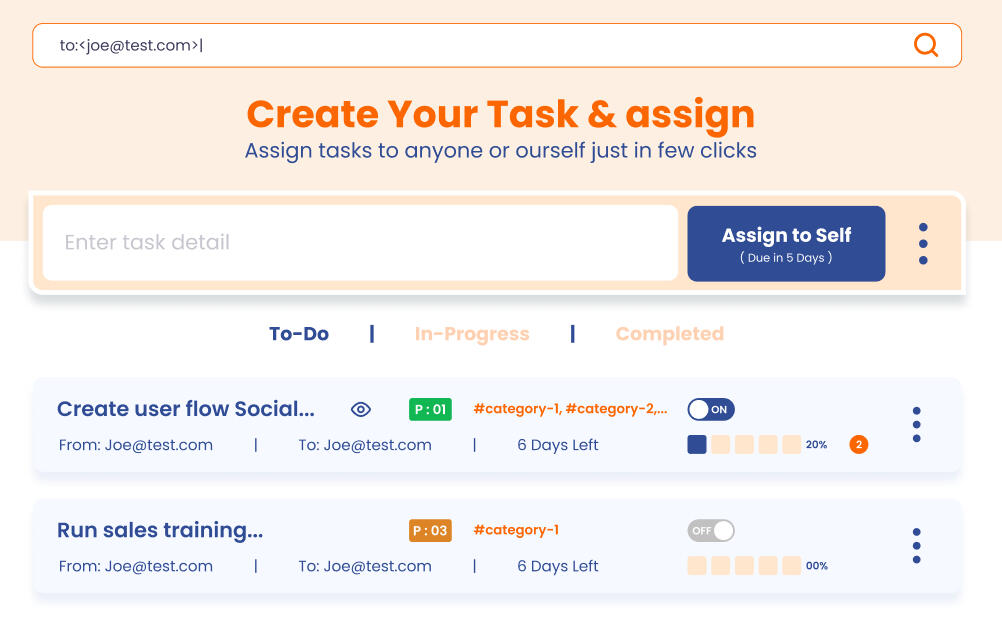
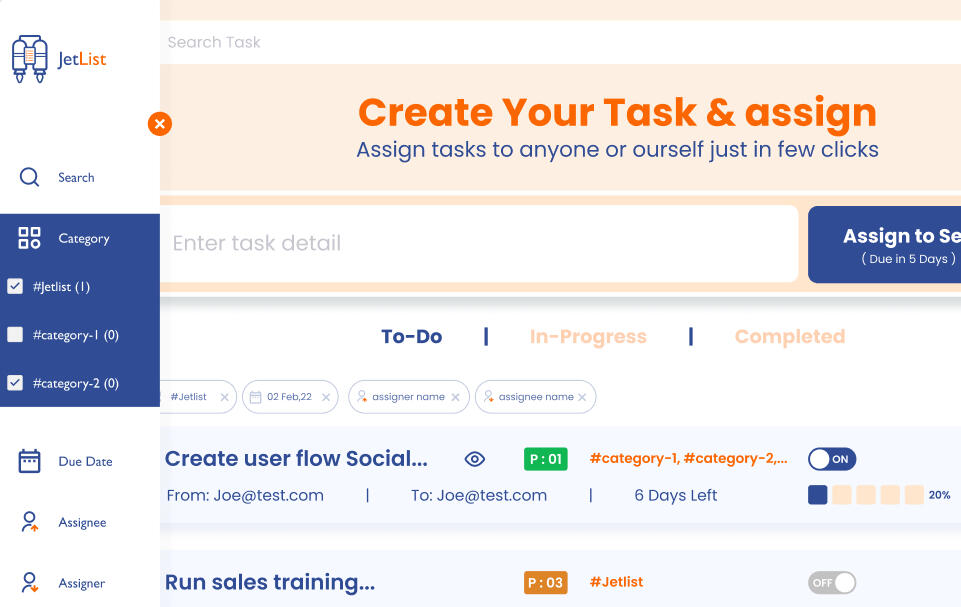
The core of the Jetlist app is the “Create A Task & Assign” field.
The simplest way to create a new task is to enter a description of the task, and click “Assign to Self”. The new task will automatically appear under “To-Do”.
The new task, under “To-Do”, will be assigned to you.
Created Task Breakdown
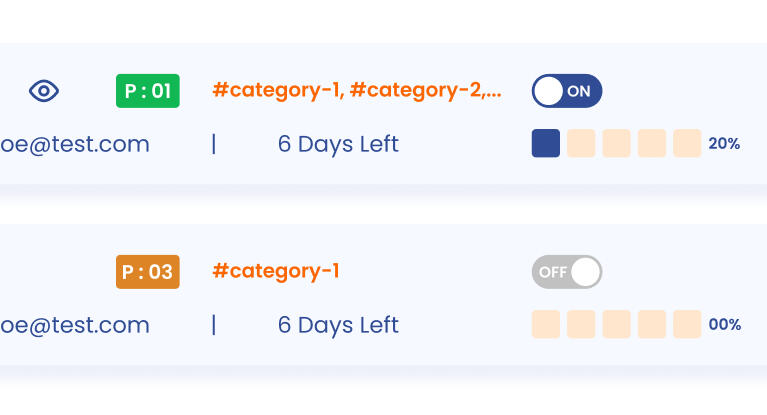
In the newly created task you can see your task description, the assignor, and the assignee.
You can also see how much time you have left to complete the task.
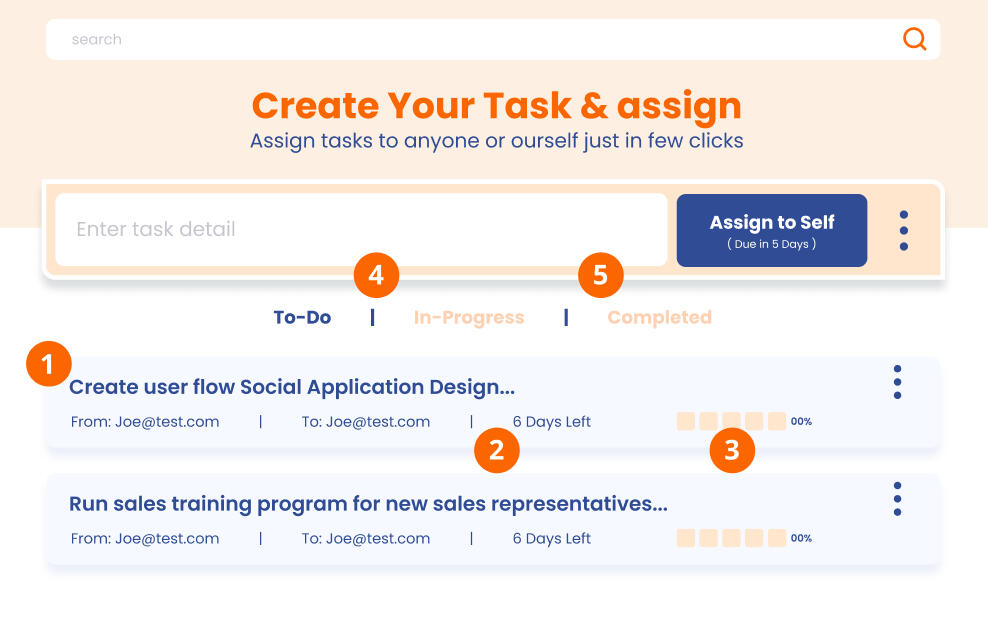
The very right side has a progress bar for the assignee to indicate how much progress has been made by clicking on the boxes to fill them in. Filling in 1 box equates to 20% of the task being done, 2 boxes equates to 40% and so on.
Because tasks are organized by progress, filling in 1 or more boxes moves the task from under “To-Do” to under “In-Progress”.
Filling in all of the boxes moves the task from under “In-Progress” to under “Completed”
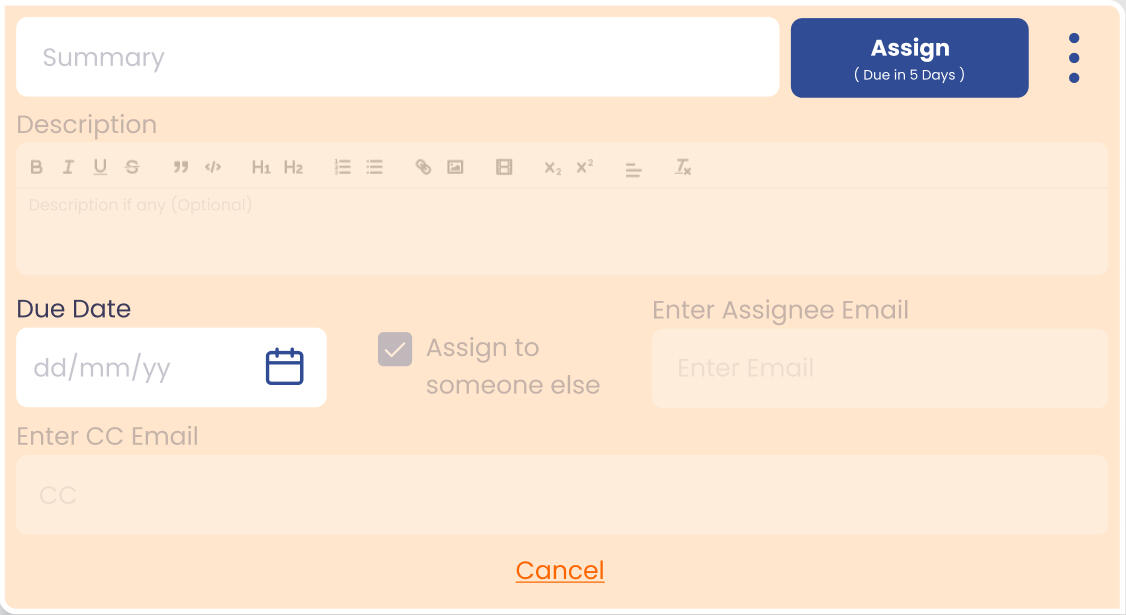
Additional Task Creation Options
When creating a new task, clicking the kebob menu on the right side (three vertical dots) reveals additional options for adding tasks to the to-do list.
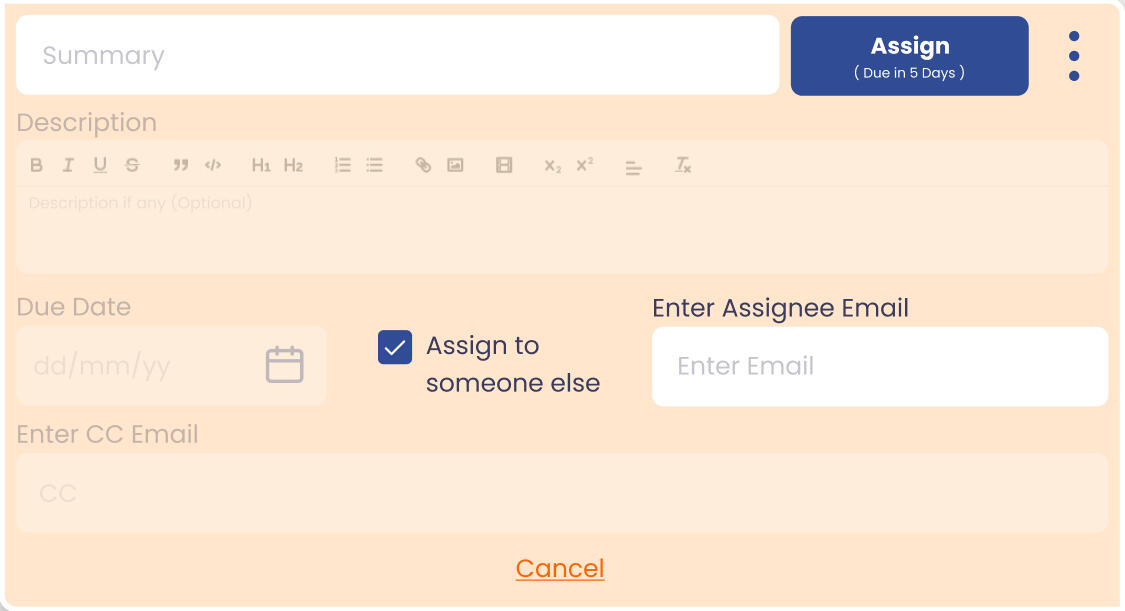
Assign to Others
Checking the box labeled “Assign to someone else” allows you to assign this new task to a different person, as well as add a description of the task for more detail than the summary.
Custom Due Date
The other additional task option is making a custom due date. As seen in the Getting Started section, the default due date for any given task is 24 hours after that task is created.
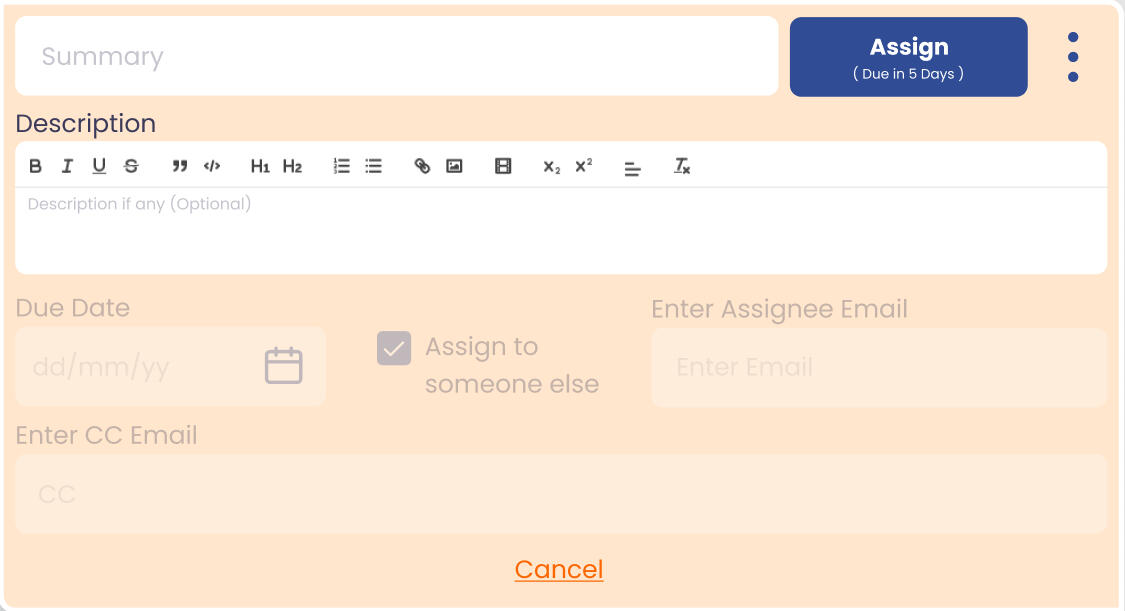
Adding Task Description
Task descriptions can be added if needed by entering text into the field below the task itself. This can be useful for providing more context, details, or information.
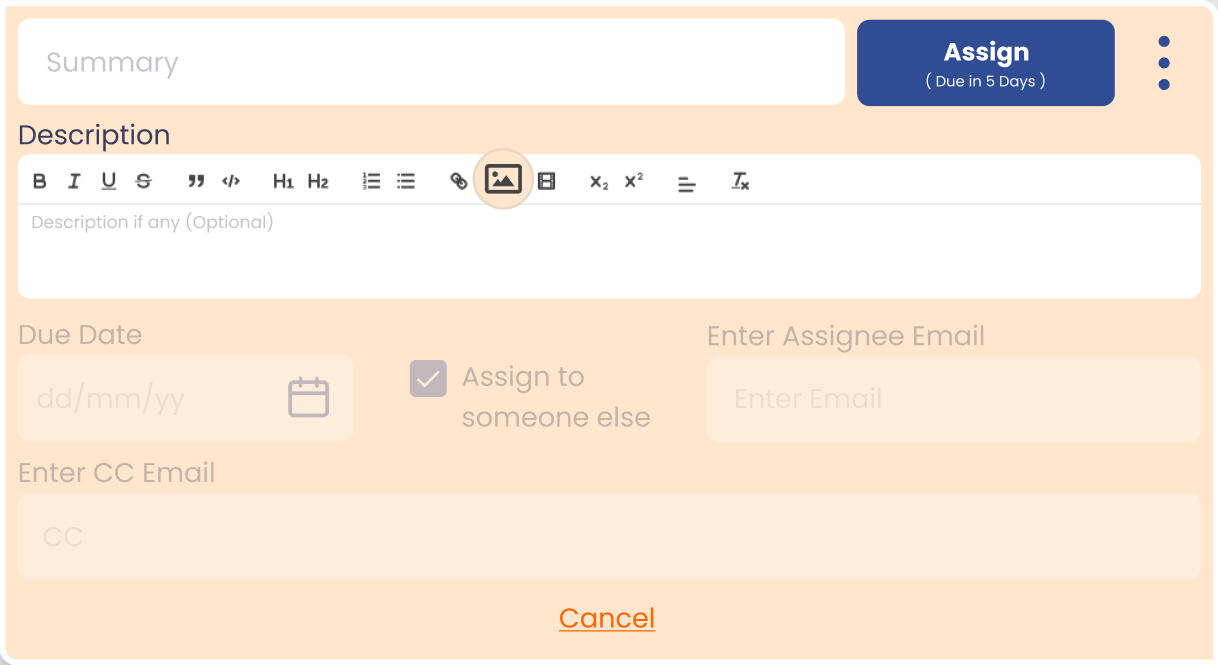
Adding Images
Images can be added to a task in the same menu by clicking the image icon.
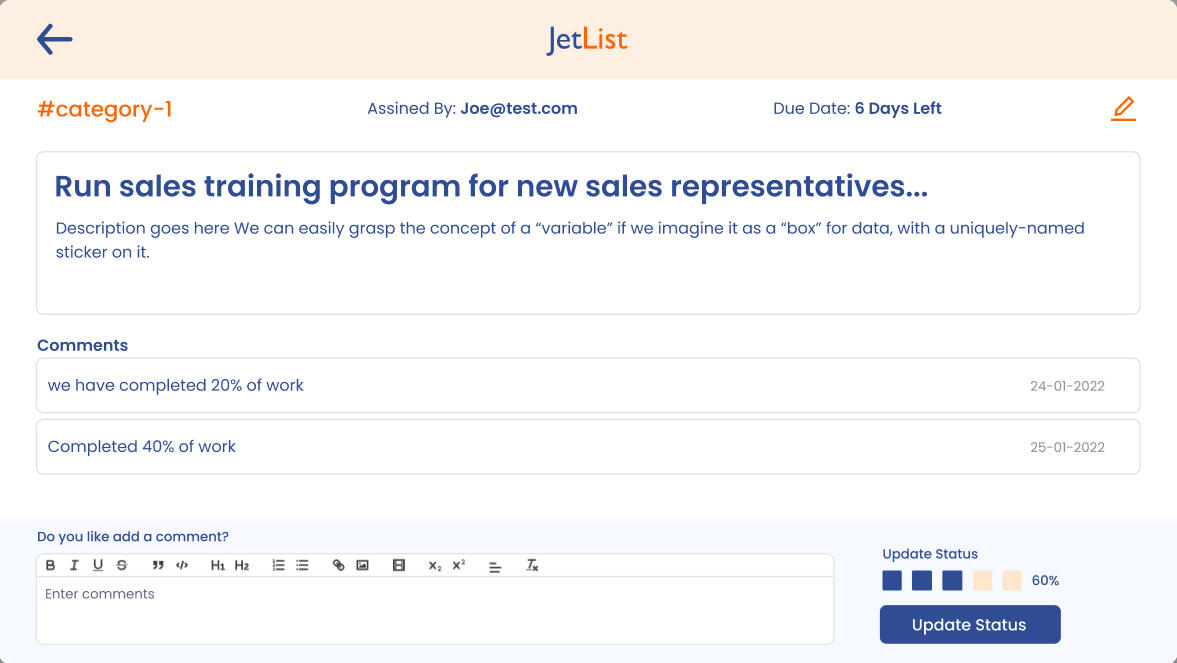
Adding Comments
After a task is created, clicking on the kabob menu can be used to add comments.
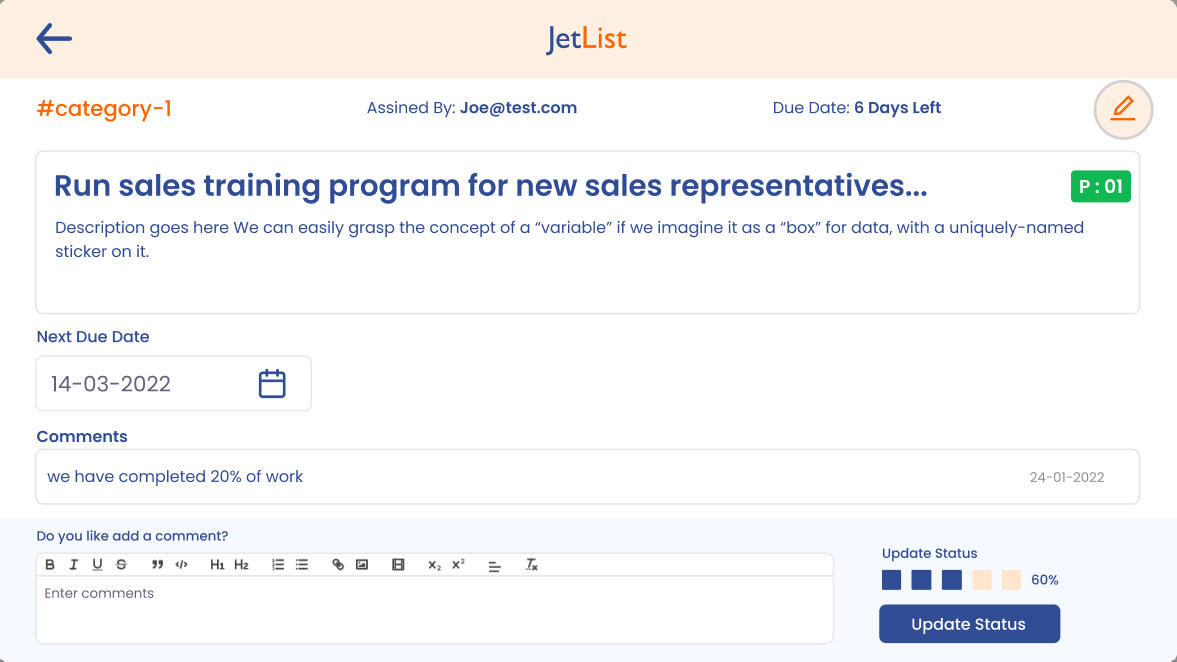
Editing Tasks
Tasks can be edited using the pencil icon after they are created.
Using Commands to Create Tasks
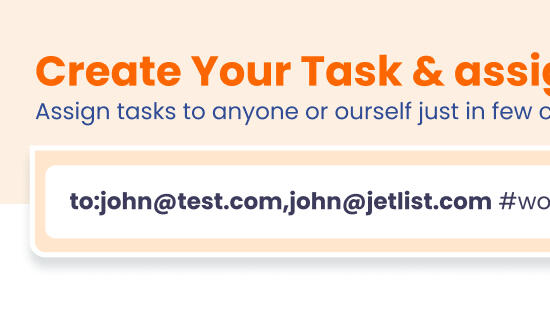
Alternatively, Jetlist also supports single line commands to create and assign tasks for a more streamlined process. Below is an example of a command with all of the possible parameters.

The command above assigns a task to john@test.com under the category of “work” (more on this later). The task is to purchase airline tickets for a trip. This task is due in 5 days.
Below are the parameters for single line commands in Jetlist’s task creation process.
to:<email> - This will specify the assignees email. This is optional. If an assignee is not specified, the task will be assigned to the user. Using a comma like so can be used to add multiple assignees. Note that there is no space after the comma. Just like to:<email1>,<email2>
#category - creates a category for the task (optional).
due:hours - assigns number of days allocated for task (optional, 24h is default).
s:level - current progress of task. The s stands for status. The value can be 0-5. (optional, 0 is default). Setting the value 3 while creating the task indicates that the task is 60% done.
Priority - indicated using p:<1-5>. This creates a color coded tag on the task. 1 is the highest priority and 5 is the lowest priority.
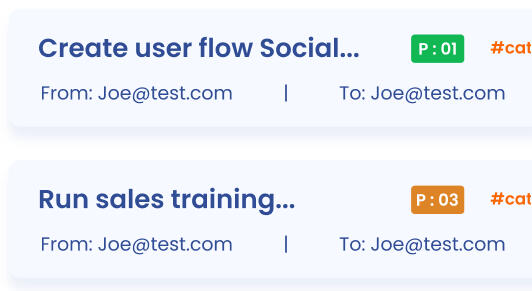
Color Coded Priority
The example of the varying color codes for task priority.
Tasks with priority levels 4, 1, and 5
Assign to Multiple People
The same task can be assigned to multiple people with a single line command using this syntax: to:<first email>, <second email> <task description>. Make sure the bolded portion has no spaces. When creating a task with a command, it is best practice to type out all of the relevant parameters first and leave the task description for the end.
CC (Carbon Copy)
You can also cc someone to make them a “watcher” of the task. The task status will update in real time for the watcher. The watcher cannot update the task like the assignee can. The syntax for CC-ing somebody for a task due in 5 days that is 20% complete. “Testing Carbon Copy cc:<email> due:5 s:1”
A CC’d task from the watcher’s perspective. Notice the eye icon to indicate watcher status
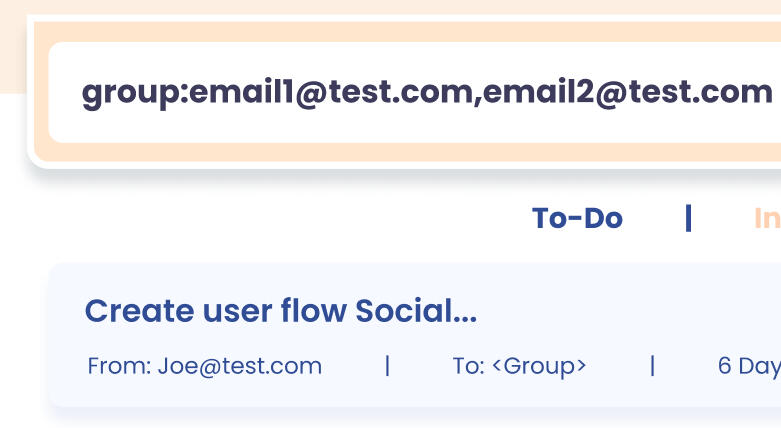
Assigning to a Group
If you want to give more than one person the ability to update the same task, you can assign it to them with the following syntax. “group:email1@test.com,email2@test.com ”
Use a comma separated list of assignees with the prefix “group:” - no spaces.
This task is assigned to a group.
Categories
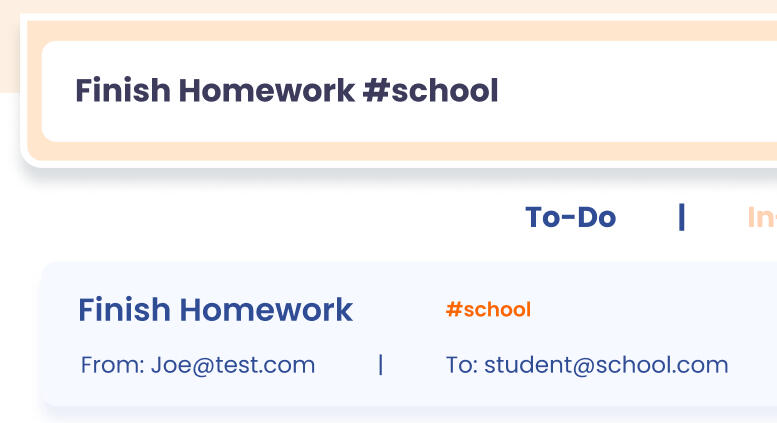
Tasks can be made more specific by adding a category when typing in the description. This can be used to differentiate between work related and domestic tasks (for example), or to group related tasks together. Adding categories works for assigning tasks to yourself or others. syntax: <task description> #<category>
Searching For Created Tasks
Free Form Search
When your to-do list is very long, individual tasks can be searched for using the free form search filter at the top of the page Freeform search has the following options that can be typed in:
to:<assignee email>
from:<assigner email>
#category
due:days
s:<progress level (0-5)>
p:<priority level (1-5)>
Filtering Tasks Using Sidebar
On the left side of the app there is a sidebar which can filter out tasks by checking off boxes instead of using the free form search. The user’s profile can also be configured here.
This sidebar can be used to only show tasks assigned to a certain person, from a certain person, due in a specific amount of time, or in a certain category. Below is a simple example of tasks being sorted by their due date with the sidebar. The sidebar also shows the count of tasks with each parameter.
Email Notifications
Jetlist Support sends automatic email notifications based on certain events in the app. The message will also contain a summary of the event.An email will be sent to your inbox if:
A new task is delegated to you by someone else
You complete a task
When you update a task’s progress
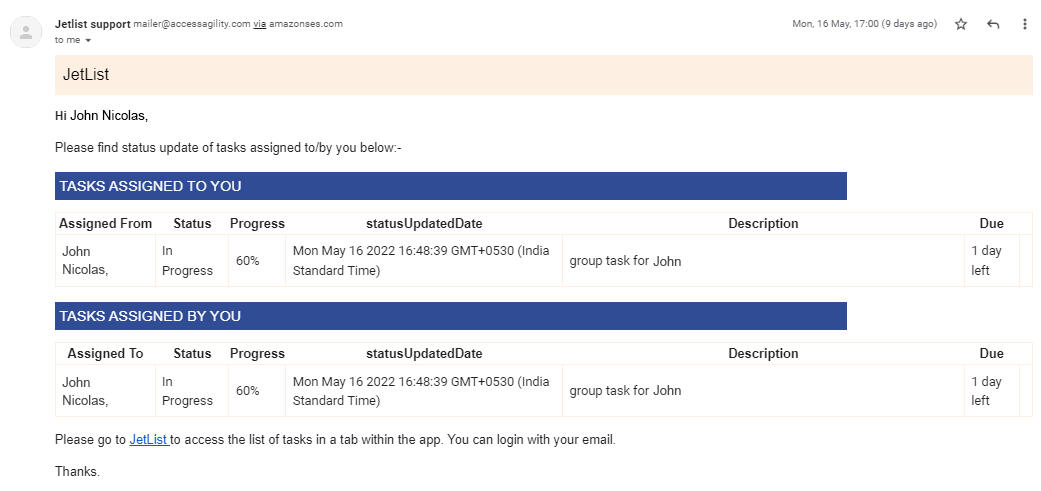
Jetlist will also send a daily status report displaying the current status of all tasks. The same attributes of a created task in the Jetlist app can be seen in these reports. These reports will be sent at 5 am and 8:15 pm local time. After two days, completed tasks will be removed from the status report.
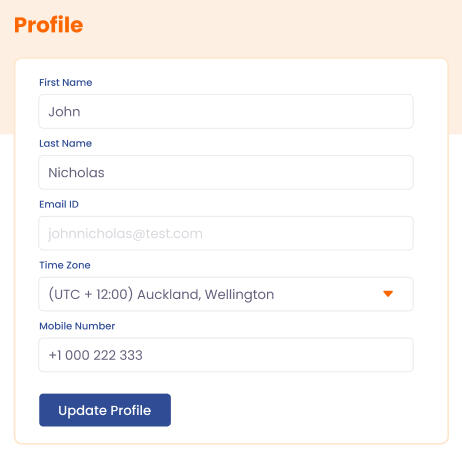
Configure Profile
The user’s profile can be configured using the last option in the sidebar.
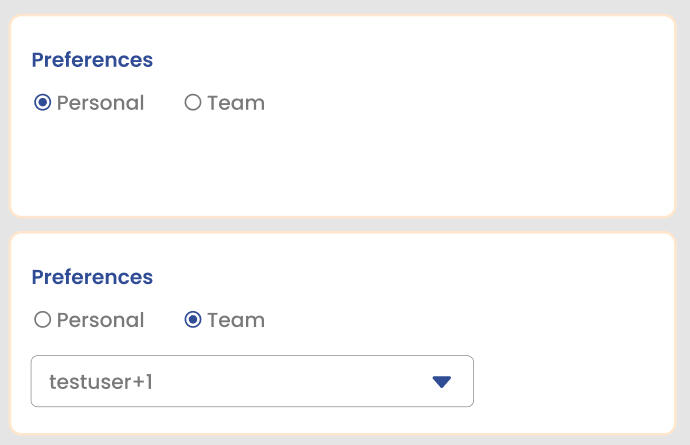
Preferences
Personal - In Personal preferences, the app shows the personal account by default whenever it opens.
Team - In Teams preferences, the user has the ability to choose which teams will appear by default

Logging Out
After the initial login using your email address, Jetlist will remember your credentials for seven days. You will not need to enter your email each time you want to use the app for those seven days. If you are using a shared system, log out each time you are done with the app.
FAQs
No. Jetlist uses passwordless authentication which does not require making an account. Just enter your email address to receive a login link.
Simply click the To-Do, In Progress, or Completed headers based on what you want to view.
Configuring your user profile makes the automated status report emails more detailed and valuable. For example, filling out your time zone makes sure you receive the email at the end of a standard work day.
Configuring your profile also makes tasks more readable. A created task will display the relevant profile names as opposed to just email addresses.